As I have said before (and I am sure I will again), my five year old is a complicated kid. He was invited to a birthday party with a superhero theme. The kids were asked to wear their favorite superhero costume or shirt and he would not even consider wearing a superhero shirt or costume!
Not wanting to fight about it, but also not wanting him to miss out on the dress up fun, I decided to make a shirt for him that he would wear.
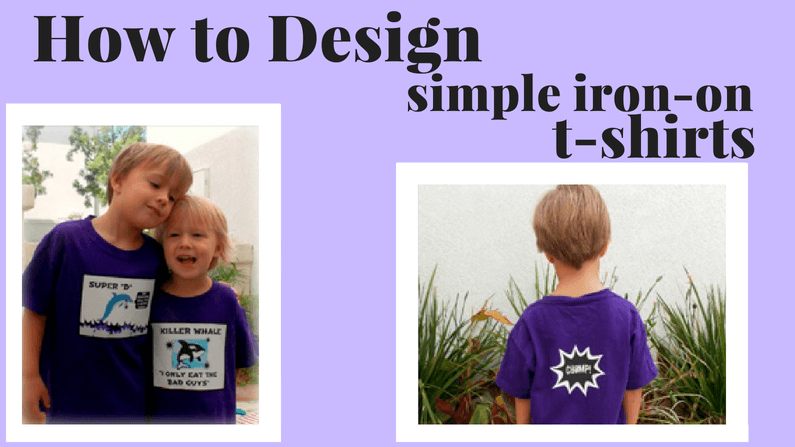
He is in to anything ocean right now, so he picked a dolphin to be a superhero (we would have had a much more menacing superhero if he could have picked a shark!). Then of course my three year old wanted a shirt too and chose a killer whale.
I was happy with the end result, but I was more happy with the creation process. I let them pick out their shirts, clip art, and help me come up with what to say. At the end they were excited to model their shirts for me and even more excited to wear them. I love that they are growing up thinking if we can’t find what we want and buy it, we can make it!
To make the shirts, I chose the “dark” T-shirt transfer sheets because I read that they hold up better when you wash them and also we used a dark shirt. Be sure to choose the light if you use a light shirt!
These are the transfer sheets that worked for us.
I inserted pictures into a Word document for printing.
Please Note: On some of the tutorials I reviewed before making this, I read that you had to reverse the image, but on the instruction packet I had you did not need to. If you do need to reverse it, you can do that in Word at the time of printing (choose print, properties, and mirror image).
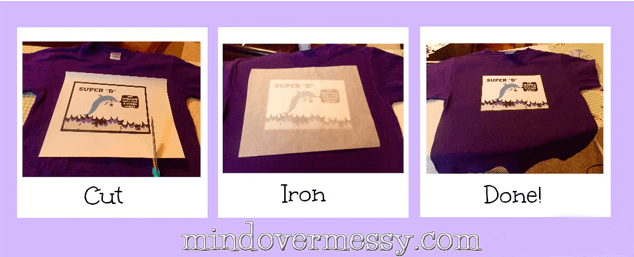
I printed onto the transfer paper, cut out the image, used the provided parchment paper on top for protection, and ironed according to the directions (for me 20 seconds pressing hard until the entire surface was covered). I peeled back the paper after five seconds and was done. So easy I ended up adding the word “Chomp” on the back for fun.

The shirts were very fun and inexpensive to make. Both Michael’s and Hobby Lobby have shirts for around $3.00 and the iron on transfer paper was less than $6.00 for 5 sheets but I only needed three. It worked out to about $5 per shirt and I am excited to see what else I can iron on with the rest of the paper. I may splurge next time for a better quality shirt because the inexpensive ones wrinkle A LOT. I also recommend hand washing after if you want them to wear it more than once.
We ended up with cute superheroes (how scary can you make a dolphin?), but the kids were happy and were part of the dress up fun at the party and that’s what counts. I would love to see what iron on shirts other people come up with.


AFFILIATE DISCLOSURE: This post contains affiliate links. If you purchase a product through these links the cost will be the same to you but Mind Over Messy will receive a small commission. We only recommend products we have tried and love and hope you love them too! If you do purchase a product through the links, we appreciate the support as it keeps this blog a running.


 Welcome! Our modern lives can be so hectic that it is so helpful to find easier ways to get a healthy meal on the table, meditate even if the kids are loud, and stay active any way that we can fit it in. This blog is dedicated to making Mindful Living Easier.